Category Archives: Fly Tying

Blogs related to tying flies

Prince Nymph – 12/06/2019

Prince Nymph 12/06/2019 Photo Album

A material table for the prince nymph is available on my 12/03/2011 post on this blog. The prince nymph enjoyed a resurgence in my fly box during the past two seasons, and a main reason is the success it delivered during green drake hatches. Apparently a size 12 peacock imitation is a close approximation of the nymph stage of the large western green drake mayflies. Check out my South Boulder Creek 08/15/2019 post for an example of prince nymph productivity in advance of a green drake hatch.

As Good as It Gets

The other prime situation that creates prince nymph success is the egg laying stage of a grannom hatch. A size 14 prince tied on a curved scud hook historically delivered superior results on the Arkansas River and other western streams during the April and May caddis event. My post of 11/17/2018 does a nice job of describing these prince nymph applications, and it also describes some improvements that I introduced to my tying technique. Mounting the white horns with the points of the biots extending beyond the eye of the hook and then bending back to lock them down has dramatically improved the durability of my prince nymphs, particularly the larger sizes.

Horns

The new found effectiveness of the size twelve prince nymph resulted in some depletion of my inventory, so I tied four new models to elevate my count to ten. In addition I manufactured four size 14’s and refurbished a pair of size 16’s. I am confident that my supply will be adequate for the 2020 fly fishing season.

Completed Batch

20 Incher – 11/22/2019

20 Incher 11/22/2019 Photo Album

Ever since a guided fly fishing trip with Royal Gorge Anglers on the Arkansas River I carried a supply of 20 inchers in my fly fleece wallet. During 2019, however, I knotted one to my line more frequently than during previous seasons, and I was pleased with the results. Increased usage, however, also depleted my supply more than usual, so I approached my vise and produced an additional quantity of ten to increase my inventory to twenty-five.

Fine 20 Incher

If my readers are interested in tying this large attractor stonefly imitation, please refer to my post of 01/06/2019. This blog entry from earlier in 2019 displays a materials list, and several YouTube videos do a nice job of teaching the fly tying steps. During several recent fall outings I positioned the 20 incher as the top nymph on dry/dropper and deep nymphing systems with the intent of obtaining a deeper drift, and the ploy seemed to pay dividends. I was particularly impressed with the 20 incher’s effectiveness on South Boulder Creek on 10/26/2019.

Close Look at a Clump

I seem to gravitate to this large weighted fly in the early and late season, but I hope to give it more time on my line during the summer time frame. A large dark drifting stonefly assuredly represents a significant bite of protein, that trout cannot ignore, and stoneflies get knocked loose during all seasons of the year. I love the appearance of this fly, and the application of epoxy on the wing case really makes this fly stand out. The 2020 pre-runoff season cannot come soon enough.

10 New 20 Inchers

Ultra Zug Bug – 11/21/2019

Ultra Zug Bug 11/21/2019 Photo Album

In all likelihood my third most productive fly over the last five years has been the ultra zug bug. I first stumbled on this fly in a book by Scott Sanchez, and it stood the test of time to become a proven winner from my fly box. If you are interested in the materials list or tying steps, go to my post of 12/15/2018, and there you will find links to the two items mentioned previously. A third link takes you to a post, where I describe how the ultra zug bug became an important component of my fish catching arsenal.

Ready for Actioin

During the 2019 season the simple yet effective UZB continued to earn its space in my fly wallet. It seems to be particularly effective in the spring time frame, and that coincides with pupating and egg laying caddis; however, I do not ignore it throughout the summer and fall. For a simple tie it offers quite a bit of flash through the crystal flash ribbing and the iridescent Ligas peacock dubbing. I suspect ice dubbing would be a solid substitute for the Ligas peacock dubbing, but I am a creature of habit, who abides by the motto of don’t mess with success.

Up Close

A quick count of my supply revealed a total of forty-four, so I spun out sixteen additional copies to increment my inventory to sixty for the 2020 season. I am certain to catch a fair number of trout on the ultra zug bug in the coming year.

A Batch of 16

Salvation Nymph – 11/17/2019

Salvation Nymph 11/17/2019 Photo Album

The salvation nymph clearly established itself as my number two producer, and it may have surpassed the beadhead hares ear nymph in 2019. Aside from being a premium fish attractor, it is relatively easy to tie, as well as being a very durable fly. The official name of the commercial version of this fly is tungsten salvation nymph, but I substitute a less expensive gold brass bead for the tungsten, and the fish do not seem to mind. If you plan to fish fast water, and you desire a rapid sink rate, by all means substitute a tungsten bead.

My post of 12/30/2011 provides a materials list and describes the tying steps required to create this fish magnet. I continue to tie my salvation nymphs in the same manner, as I did in 2011. Last year I applied Solarez UV resin to the nymph back, and I marveled at the results. This is the only significant modification that I made to the initial tying process.

Nicely Done

The salvation nymph yields peak results in the June through August time frame in Colorado. This time period coincides with pale morning dun emergences, and I suspect that the salvation represents a flashy version of a pheasant tail nymph, and thus, a reasonable imitation of a pale morning dun nymph. One should not, however, limit this fly to purely a PMD imitation, as it generates action throughout the season, albeit not quite as intense, as the months I cited. All the components of the fly scream fish attractor including the ice dub abdomen and thorax, the flashback and flashabou nymph back and wing case, and the flexible silli legs. It qualifies as an attractor nymph year round, and it also serves as a viable imitation of small stoneflies. Fish love it.

Macro of a Few Jewels

I performed my usual count of all the salvation nymphs in my various storage compartments, and I determined that I held 68 in inventory. My goal for the start of the 2020 season was 100, so I cranked out thirty-two shiny new versions and then added five for a friend. When I gaze into the salvation nymph compartment in my large plastic fly box, I get a warm feeling knowing that I am more than adequately equipped for the upcoming season.

32 New Salvation Nymphs


Hares Ear Nymph – 11/02/2019

Hares Ear Nymph 11/02/2019 Photo Album

The beadhead hares ear nymph rocks. Year after year it is my most consistent producer throughout all the seasons of the year. What does it imitate? I suspect a reason for its universal effectiveness is its ability to represent numerous underwater life forms. Surely the coarse fur and earthy color cause it to be mistaken for a caddis pupa. Numerous mayfly species carry a gray-brown color and the general shape of a hares ear nymph. A guide also informed me that the hares ear nymph is a reasonable representation of the nymph of a yellow sally stonefly. Dare I suggest that it also serves as a copy of a cranefly nymph? Given this versatility it is no surprise that a beadhead hares ear nymph is my most productive fly.

A Later Model

My post of 11/05/2010 provides a materials chart and describes a few of the alterations that I applied to the standard pattern. I tie them on a scud hook to give the body a slight curled appearance. I substituted Tyvek strips for turkey quill for the wing case. This synthetic addition is nearly indestructible, and many sources are available such as Fedex mailing envelopes. I use race bib numbers and color them with a black magic marker. A standard hares ear specifies a gold tinsel rib, but I utilize fine gold wire. Of course the gold bead is a modification of the original pattern, but I cannot conceive of a hares ear nymph without a bead. I now apply head cement at two intermediate steps before coating the whip finish wraps behind the bead. The first dab goes on the rear of the abdomen, after I add the tail and fine gold wire. A second application is soaked into the wraps after the abdomen is completed and the wing case is tied in.

Macro of the Materials

In my estimation an absolute necessity for an effective hares ear nymph is natural hares mask dubbing. I use the real stuff, and I try make sure that the guard hairs are incorporated into each fly. For the abdomen I make a dubbing loop and insert a blend of the natural fur and guard hairs, and this method yields an extremely buggy appearance with stray guard hairs pointing in random directions. I use the same dubbing for the thorax but without a dubbing loop, but again I make sure to roll some guard hairs into the noodle to create additional buggyness. I tie 100% of my beadhead hares ear nymphs on a size 14 scud hook. The space consumed by the bead creates a body length roughly equivalent to a size 16 nymph. I suppose I should try some different sizes, but it is hard to imagine that additional sizes could make the hares ear nymph more productive than it already is.

A Nice Clump Ready for the Fly Box (Macro)

I counted my inventory of beadhead hares ear nymphs and determined that my various storage compartments contained seventy-six completed flies. I target a starting inventory of 100 each year, so I completed twenty-four new nymphs and then added ten for a friend. I have no doubt that the beadhead hares ear nymph will once again be my most productive fly in 2020.

Missing Link – 03/06/2019

Missing Link 03/06/2019 Photo Album

Several years ago I was fishing on the Eagle River with my friend Todd, when he showed me a fly that generated a couple landed fish. It looked like a mutated caddis fly with a spent wing and a vertical wing. Todd informed me that the fly was called a missing link. I filed this information away, as a fly to investigate, but I never acted on my intention.

I Like the Swept Back Z-Lon Wings

A recent issue of Fly Fisherman Magazine featured an article by Mike Mercer of The Fly Shop in Redding, CA; and in the article Mike described how he created the missing link, and how it evolved from a spent wing caddis imitation to a potent all around attractor. Mike proclaimed that the missing link produced in a variety of hatch situations including both mayfly and caddis emergences.

Four New Missing Links

I completed my standard production tying of known producers for the upcoming season, and the combination of the two factors above prodded me to find tying instructions for the missing link. Fortunately a YouTube search yielded a video starring Mike Mercer himself, and I followed the steps as presented by the originator of the missing link pattern.

Cool UV Sparkle Abdomen

I created five size 16 missing links, and I was quite pleased with the outcome. These flies look exceptionally buggy, and I understand how the narrow flashy abdomen, spent poly wing, tilted elk hair wing, and parachute hackle create a very versatile dry fly. I personally found the fly a bit difficult to tie as a result of wrapping the parachute hackle around the elk hair wing and the small butt end stubble. Tying off the hackle feather and then finishing the whip finish were a challenge with the amount of material coming together near the eye of the hook. Despite this challenge, I feel that my flies are solid copies of Mercer’s creation, and I am anxious to float them on western streams in the upcoming season.

Sucker Spawn – 03/03/2019

Sucker Spawn 03/03/2019 Photo Album

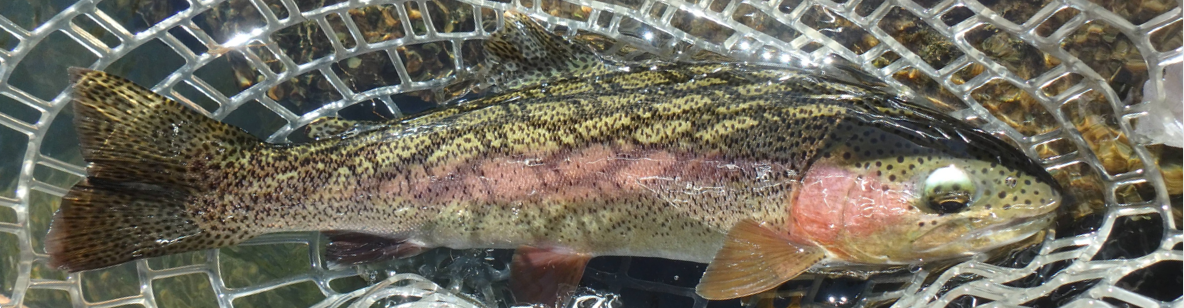
On several occasions during trips to the South Platte River in the spring I observed dense schools of spawning suckers. During one of these events, a decent blue winged olive hatch was in progress, and I was unable to entice surface takes. I pondered the idea, that the trout were chowing down on a high protein sucker spawn diet and consequently ignored the tiny mayflies. If you go to my 05/29/2014 post and scroll to a paragraph near the end, you will note, that I speculated on the effectiveness of sucker eggs during that outing in May.

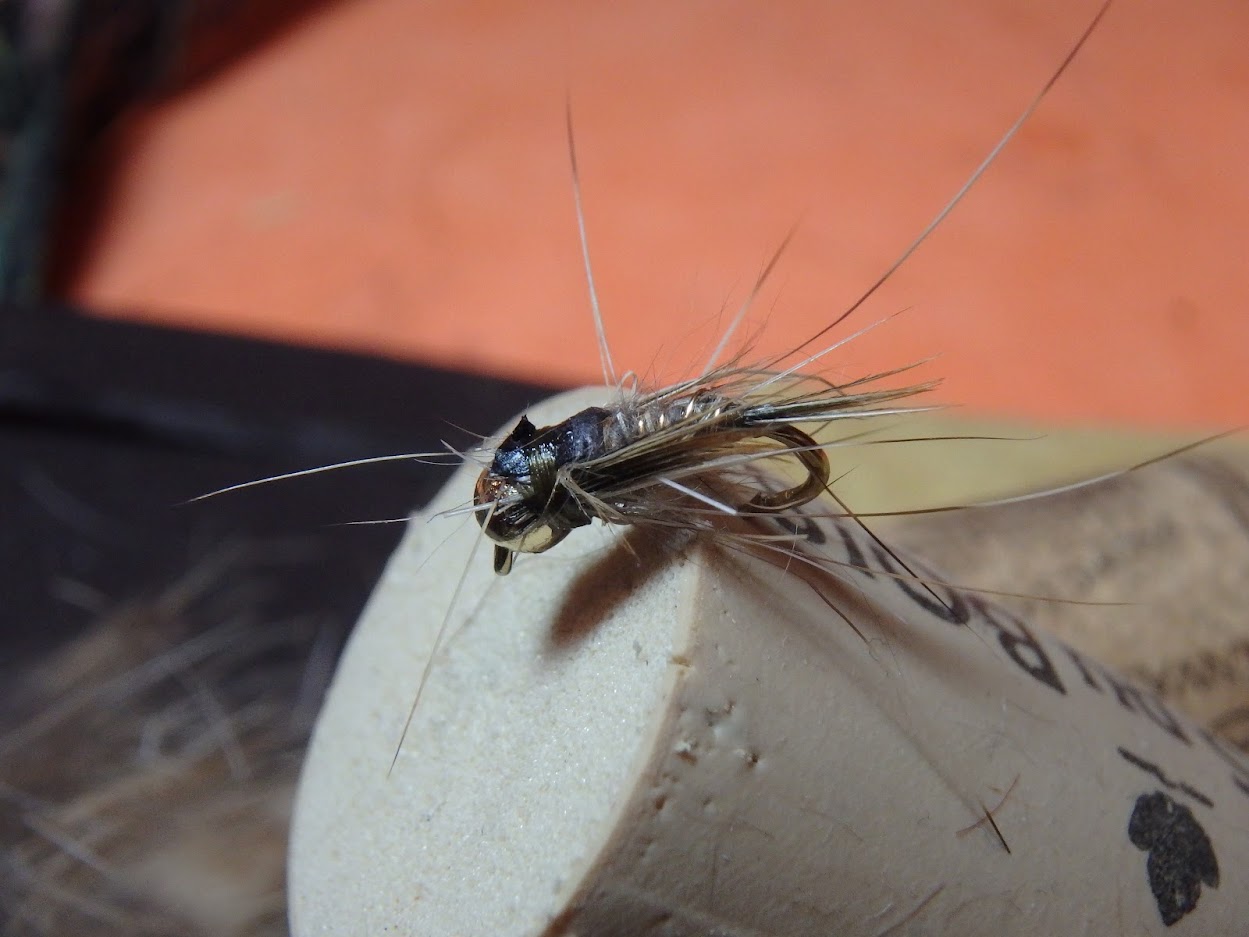
The Veil Over the Sucker Spawn Sac

Each year I attend the Fly Fishing Show in Denver during the first weekend in January, and 2019 was no different. As my friend, Steve, and I browsed the fly tier stations along the south wall, we approached the Otter Eggs area. Walt Mueller, the owner and founder of Blue River Designs and the originator of soft milking eggs, was present. After exchanging greetings, I related my theory about the prevalence of sucker spawn in the spring on the South Platte River, and he pointed to an article that was posted on the wall that described the very phenomenon that I referred to. In short, Walt confirmed that my observations were on target, and he then showed us a sucker spawn fly and demonstrated how to tie one.

Zoomed a Bit

Since Steve and I fish the South Platte River in Eleven Mile Canyon together during the spring on a routine basis, we agreed to purchase a sucker spawn kit. It consisted of three strips of soft plastic eggs and a pack of veil material. When we stopped for lunch in the food area, we divided the pack in half, and at the end of the day I returned home and tossed the sucker spawn material kit on my fly tying countertop.

The zip lock bags remained in that position until a few days ago. I completed my standard production tying and inventoried all my proven flies, and I was now prepared to experiment with new patterns. I generated the FP mergers and CDC tricos for special situations on the Frying Pan River and South Platte River, and I was now prepared to experiment with tying sucker spawn flies.
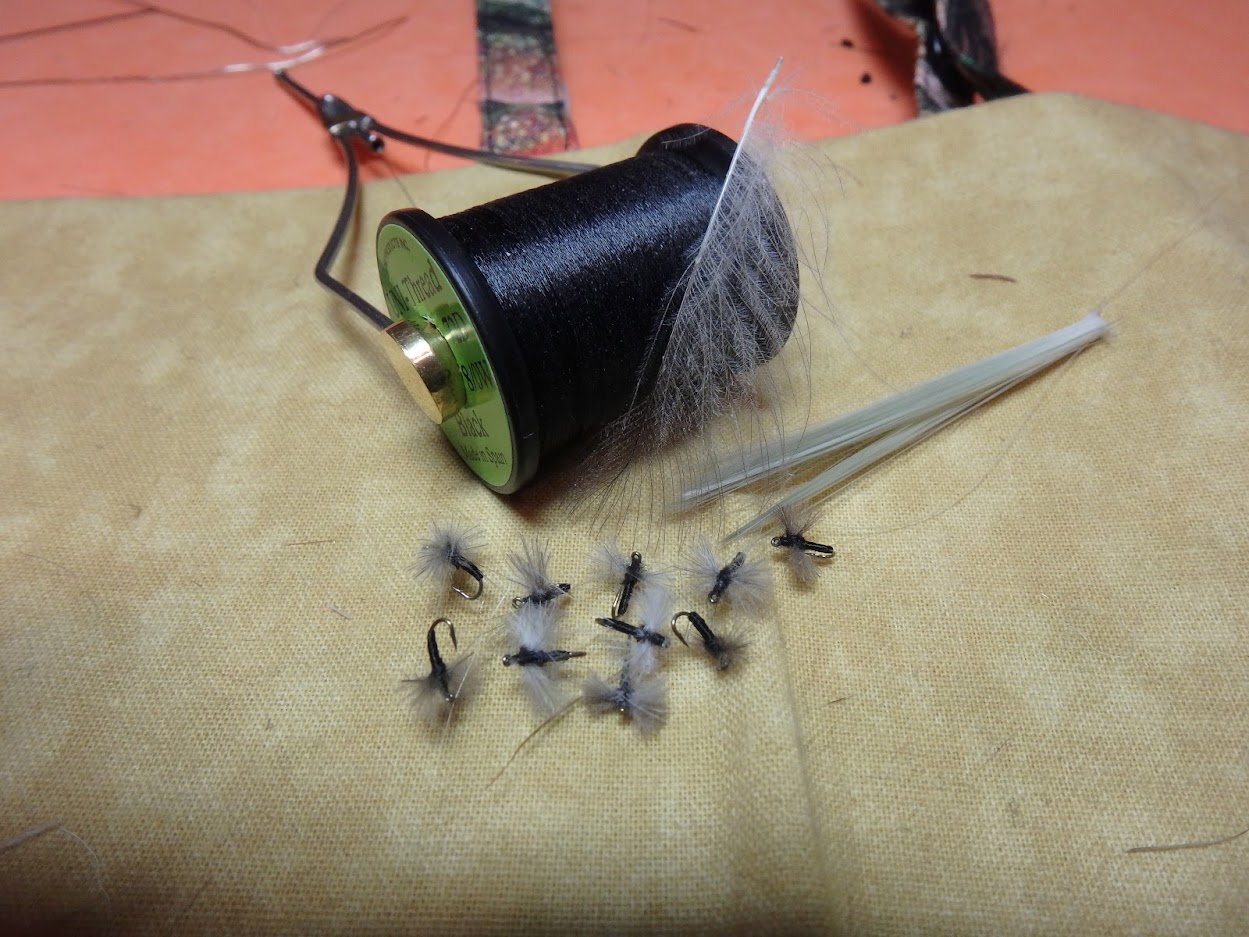
Five Completed

Walt included his business cards with the materials packs, and it referenced softmilkingegg.com, so I paid the site a visit and found detailed instructions for tying the sucker spawn egg clusters. Reading the steps and following the sequence of photos refreshed my memory from Walt’s demonstration, and it took me no more than an hour to manufacture five new sucker spawn flies. Although I had orange and yellow egg strips, I utilized the strip that progressed from clear to a light amber color. The output of my efforts look very similar to the photos of sucker spawn, and they closely matched the one that Walt tied and gave to me as an example.

Today I placed three of the sucker spawn flies in my fleece wallet, and I am anxious to test them on the South Platte River in the spring. Perhaps I will tumble them along the bottom of other Colorado streams, since suckers are not limited to the South Platte drainage. We remain in the grip of winter, so mild weather is all that is required for me to hit a local trout stream and test my new sucker spawn flies.

CDC Trico – 02/27/2019

CDC Trico 02/27/2019 Photo Album

In my previous post on the FP Merger, I described a fly, that I created to solve a challenging situation, that I encountered on the Frying Pan River in early May of 2018. Only time will tell if the FP Merger imitates the tiny emerging midges savored by Frying Pan River trout.

On 09/06/2018 I endured a similarly frustrating day on the South Platte River. For a two and one half hour period beginning at 11:00AM an abundant quantity of hungry and large trout gorged on a dense trico spinner fall. At the end of this aquatic feast I could only report two landed fish. I was grateful for the presence of massive quantities of tasty delicacies, but I was also frustrated by my inability to hook and land more fish. I pledged to address the situation during my winter fly tying activities.

Overhead Look

In February the time arrived to solve the trico spinner puzzle that frustrated me on the South Platte River in early September. The natural tricos that I observed were very tiny; I estimated that they were equivalent to a size 24 hook, and they possessed extremely slender bodies.

I clamped a size 24 Tiemco 100 hook in the vice and wrapped a thread base of black 6/0 from behind the eye to the bend. At the bend I split two very fine dun microfibbets, and then I wrapped a slender tapered abdomen, until I reached a point one-third of the shank length behind the hook eye. I knotted the 6/0 black thread and attached a spool of 8/0 thread at the forward end of the abdomen. I switched thread to minimize bulk on the minute size 24 fly. Next I stripped ten CDC fibers from a gray wing and rolled them in a bundle and attached them to the top of the front one-third of the hook. I executed a series of figure eight wraps that forced the CDC to align perpendicular to the hook shank, and then I dubbed super fine black dubbing in the thorax area. I completed a three wrap whip finish and snipped the thread. The 8/0 thread was necessary to minimize the bulk created when adding the figure eight wraps, dubbing and whip finish. For my final step I pinched the CDC below the shank and forced the fibers upward and cut them so they were equal in length to the abdomen.

Dun Microfibbets, CDC Feather and Black Thread

I am very pleased with the outcome of this effort. The flies are very dainty, and I am convinced they will present an accurate profile of the naturals that I observed in September 2018. The CDC wing will aid floatation, until they are gobbled by a ravenous trout. Drying and fluffing the CDC after it becomes saturated will be a future challenge, but I have managed it previously with my CDC BWO imitations. The CDC trico will be very difficult to track, but I can always resort to the double dry ploy with a larger visible dry fly in front of the small trico.

Ten Tricos

Trico hatches do not generally develop until late July, so I have five or six months to wait, before I can test the ten CDC tricos that arrived from my vise in February. As always I am overly anxious to test my new flies in a real world application.

FP Merger – 02/26/2019

FP Merger 02/26/2019 Photo Album

Before reading this narrative on a new fly I developed, I encourage you to follow this link, Frying Pan River 05/10/2018, and check out the photos of the naturals, that I seined from the river on that date. If you take the time to read the report, you will learn that I experienced a relatively frustrating day on May 10, 2018. At the time I made a mental note to revisit this day during fly tying season, and the FP merger is the product of that commitment. A massive quantity of trout rose over a four hour period within the twenty by twenty yard area that I occupied, and I was largely thwarted in my efforts to take advantage of the dense midge hatch. Ultimately I concluded that my greatest problem was the lack of tiny size 24 flies.

Dense Midge Hatch Lingered for Four Hours

Before tying the FP merger I retrieved images of the mass of natural biomass, that I captured, when I seined the river. The net included translucent tan-gray husks and midges in the process of emerging from the pupal case. The emergers displayed a medium to dark gray body and a dark, almost black head. In case I visited the Frying Pan River at the same time of year again in the future, I sat down at my vise and designed a fly, that I hope replaces frustration with joy.

Size was the most important factor to me, so I began with a size 24 Tiemco 100 dry fly hook. I started medium gray 6/0 thread near the eye of the hook and covered the shank to the bend. I returned to a point 1/3 of the shank length from the hook eye and built up a very slender tapered body. The naturals possessed extremely narrow bodies, and I opted for thread only to minimize bulk. Next I stripped a clump of fibers from a gray CDC feather, and I tied these in at the 1/3 point behind the hook eye. I estimate that I used ten fibers for each wing. I wanted enough bulk to make it visible, but I did not want it to flare out so as to represent an open fluttering wing. An emerging wing was the ideal image that I sought.

Size 24

At this point I knotted the gray 6/0 thread, cut it off and replaced it with 8/0 black thread. I did this to minimize the bulk around the small head space on a size 24 hook. I retrieved some black ostrich herl from my supplies and stripped one four inch strand from the stem. I tied the black herl in front of the CDC wing and made two wraps and then tied it off and did a three wrap whip finish. As a last step I made an angle cut of the CDC wing, so that it was just short of the hook bend.

A Batch of Seven and Associated Materials

I am very pleased with the product of my design. I suspect size is the most important factor, and therefore the slender size 24 will match the size. Shape and silhouette are probably the next consideration, and I feel that the narrow body, small wing tuft and black ostrich herl head are representative of the real bugs. Color is the third factor, and gray and black are a solid choice that represent many natural insects. I am sure that I could browse through catalogs and search on line and find the same fly designed previously by someone else, but it was fun to attack the problem with my personal thought process. The fly will be next to impossible to track, but I can always use the ploy of a six to twelve inch dropper behind a more visible front fly.

The trout of the Frying Pan River are probably in defense mode already with the creation of this tiny fly. I hope to visit the tailwater in early May in 2019.

Deer Hair Caddis – 02/24/2019

Deer Hair Caddis 02/24/2019 Photo Album

Caddis represent one of the most prevalent aquatic insects throughout North America and in all likelihood, the world. I never visit a stream without an adequate supply of deer hair caddis. I stock size 14, 16 and 18; and I focus my body colors on olive-brown, light gray, tan, and pale yellow. This array of caddis seems to cover nearly all the situations, that I encounter on the streams, that I visit. For a material table and additional commentary on the deer hair caddis visit my post of 11/28/2011.

I tie the deer hair caddis in a very sparse manner, and this style served me well over the years. I recall several situations, where I caught fish, while a nearby fisherman experienced less success; and when we compared flies, the other angler displayed a much bushier version of the caddis. I do rely heavily on stimulators in size 12 and 14, and these flies form a much fuller image to feeding trout.

Side View

I collected all my deer hair caddis from my various sources and determined that adequate quantities remained from previous tying efforts. I found three size 16’s that were lacking a full wing, and I partially deconstructed them to add a fresh deer hair wing and hackle. One possessed a light gray body, and two carried an olive-brown body. A full wing is critical, as it greatly improves the visibility of this earth-toned fly.

Two Dark Olive and One Light Gray

The deer hair caddis is obviously a useful pattern for blizzard caddis hatches, but I also prospect with them in situations when the trout exhibit an elevated level of selectivity as evidenced by numerous refusals. Caddis season cannot arrive soon enough in 2019.