Monthly Archives: February 2013

Toesies – 2013

Up until three or four years ago I wore Salomon rear entry ski boots and was reasonably satisfied with their performance; however, after receiving some good natured teasing from my friends and family, I decided to purchase some new boots. The trusty Salomon’s were obviously dated from a fashion perspective, and they were also somewhat compressed allowing more than desired movement.

02-23-2013 Skiing Photo Album

During the annual T-Rex sale at Colorado Ski and Golf I purchased a new pair of Dalbello boots and while these boots definitely eliminated foot movement, they also presented a setback in warmth and comfort. Midway through the first season I took them to a ski shop in Vail that was connected with Colorado Ski and Golf and had a custom footbed added. This improved the comfort by eliminating hot spots and numbness, but I still experienced cold toes on below average temperature days. In addition I struggled to put the boots on and take them off as the rigid plastic shell pinched around the tongue and dug into the top of my foot.

I suffered with these problems through several seasons until last year when I looked up a custom boot fitter in Denver and paid him a visit. The individual that I consulted with performed some grinding on the plastic shell and suggested closing only the upper buckles until I was actually ready to ski. He suggested that keeping the bottom buckles loose would allow my foot to move and properly seat, and this would allow my feet to remain warm longer. This consultation took place at the very end of the 2012 season, so I didn’t really get to test the effectiveness until 2013.

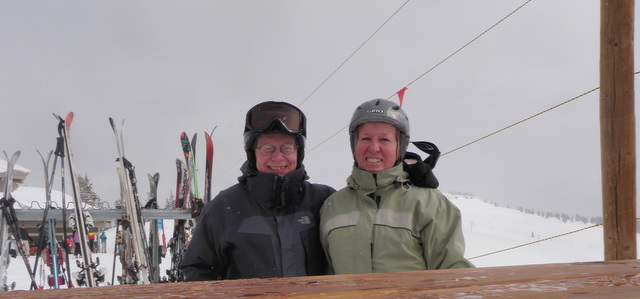
A Nice Smile in Rare Sunshine

A Nice Smile in Rare Sunshine

Jane was fully recovered from her bicycle accident by the end of January and received clearance from the doctor to ski, so we rented a condo in Frisco, CO on the weekend of February 8-10 and decided to ski at Beaver Creek on Saturday. Jane wanted to stick to mild slopes, and we knew we could use free parking at Arrowhead and access Beaver Creek from there. Saturday February 9 was a very cold overcast day with snow falling regularly for most of the afternoon. The high temperature probably never exceeded the mid-teens. In short it was a good day to test putting my boots on and off and evaluate any improvement in the warmth of my feet. I’m disapointed to report that the advice and changes from the Denver boot fitting store were ineffective. The plastic shell continued to dig into the top of my foot resulting in pain, and my toes only lasted two hours maximum before I was forced to visit the Arrowhead base lodge to warm them.

While sitting in the restaurant at Arrowhead I met an elderly individual from Lousiana named Eddie. He was proudly sporting a LSU hat and told me he was a retired veterinarian. Somehow in the course of conversation Eddie informed me that he used “toesies” and his feet remained toasty warm.

After suffering for much of the day on February 9, I decided that I needed to address the ski boot situation before our next scheduled condo rental and ski outing so I called Larry’s boot fitting in Boulder, CO for an appointment. Heather answered the phone and told me that I didn’t need an appointment if I could stop in that very afternoon. I made a hasty exit from work, returned home and picked up my boots, and made the thirty minute drive to Boulder and Larry’s boot fitting. A young man asked me what my problem was and I described the boot shell issue and cold feet. He showed me a technique for entering and removing my boot that involves pulling the tongue at an angle to one side to block the shell and then using the other hand to hold the exposed shell edge while sliding my foot in. As to cold feet, he told me that my boots were the proper size and that I probably needed to put up with it. He said I could get neoprene covers or new liners, but this would probably only make a 20% improvement or perhaps add another .5 hour before I needed to go inside and warm my feet. The best solution was to purchase heating elements that fit inside my boot, but those typically cost $200 – $250.

Jane and Dave After Lunch

Jane and Dave After Lunch

I decided to try the toesies recommended by Eddie from Lousiana and the new method of putting on and taking off my boots during our February 23 ski day at Vail before resorting to heating elements. Jane and I got off to an early start on February 22 and arrived in Frisco early enough to take a walk downtown and stopped at the Prost Tavern for a Hofbrau Dunkel and a delicious massive soft pretzel with various mustard dips.

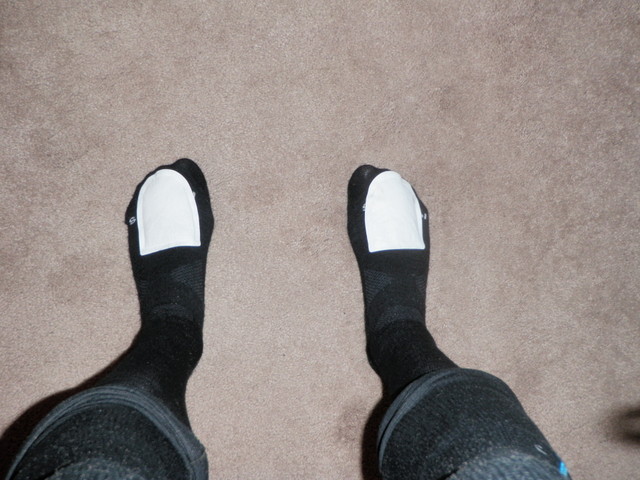
On Saturday morning we made the drive over Vail pass and parked at the Vail Village parking structure. The air temperature was moderately warmer than February 9th so the conditions were not quite as adverse. Step one was putting my boots on in the Vail heated parking garage and the new method worked quite well as I avoided any shell to skin contact. Jane and I began skiing using the Golden Peak lift and when we reached the top of the mountain near Two Elks Lodge we descended China Bowl and headed directly to Blue Sky Basin. We skied from 10:30 until around 11:45 and my toes did not reach the typical numb ice cube state. We chose to go in for lunch because we were hungry, not because my feet were frozen. I could feel warmth coming from the toesies mounted on top of my toes so I’m convinced that they were the source of my improved warmth and comfort.

Dave Discovered Toesies

Dave Discovered Toesies

Afer lunch we continued skiing until 3:15 and then returned to the parking lot to remove our boots. The new method allowed me to remove my right boot without painful contact, but I needed Jane’s help on the left foot as I didn’t have a way to hold the boot on the garage floor while I lifted my foot since both my hands were occupied with holding back the plastic. Once I removed my feet from the boot I touched the toesies, but they were no longer generating any heat. I suspect that they last for around six hours and then lose their effectiveness.

I went to Big Five Sporting Goods this week and picked up four more packs of toesies. Hopefully these devices will improve my comfort level and make skiing a fun activity again.

Deer Hair Caddis

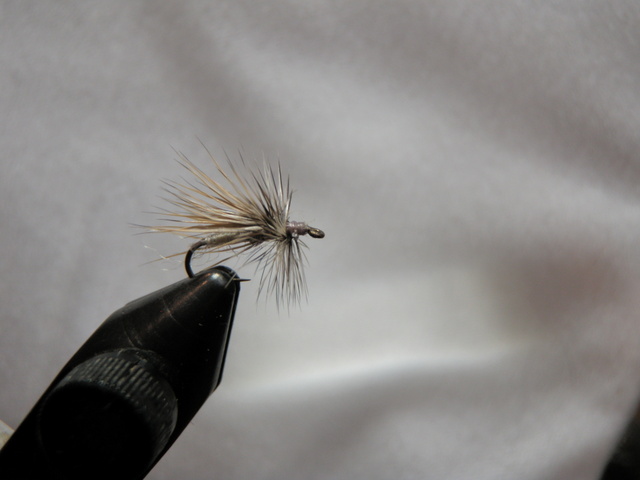
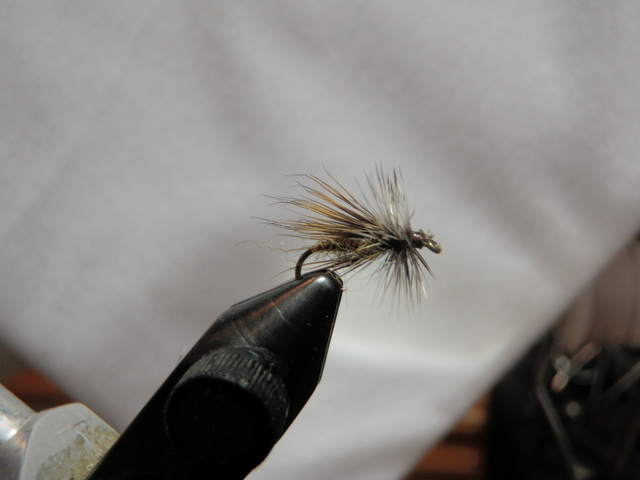
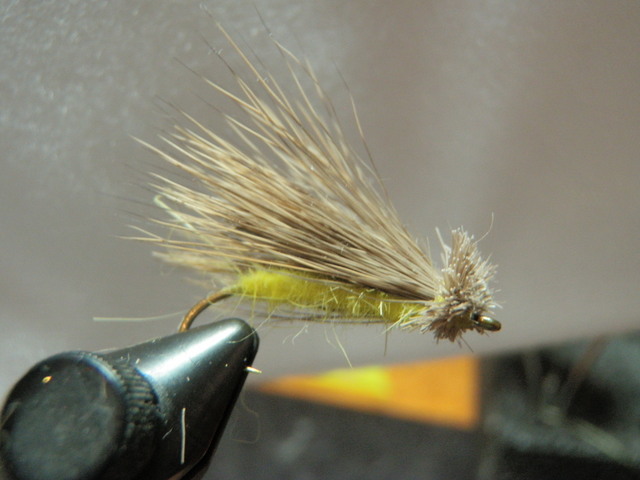
A stalwart consistent reliable fly in my arsenal has always been the deer hair caddis. I tie these flies with dark olive brown bodies and light gray bodies. The dark olive brown body versions are matched with darker wings; whereas, the light gray body model is paired with light tan wings. I add grizzly hackles on the front of both colors.

Deer Hair Caddis Photo Album

Entering the 2013 season I plan to have 15 of each color in size 16 and an equal number in size 14 and I’ve completed all the dark olive brown versions and have five more size 14 light gray flies to complete.

Light Gray Deer Hair Caddis

Light Gray Deer Hair Caddis

I’ve been tying these flies almost since the beginning, but this winter I’ve added a couple improvements to the process. To improve the durability of the fly I’ve begun adding a small drop of head cement to the thread wraps in front of the body before attaching the deer hair wing. This improves durability and helps prevent the deer hair from rolling around the hook shank. The second change is using long size 16 or 14 grizzly saddle hackles. I can tie approximately ten flies from one long saddle hackle and with my rotary vise, it is easy to grip the long hackle while spinning the vise to put three or four nice wraps in front of the wing.

Dark Olive Deer Hair Caddis

Dark Olive Deer Hair Caddis

Another plus this year was using the two deer hair patches that my friend Jeff Shafer mailed to me. The hair on these patches is so even that I skip the hair stacking step, and that’s another huge time saver.

Refurbished Flies

After I finished tying 20 Chernobyl ants, 20 Letort hoppers, and 20 gray parachute hoppers I decided to sort through the four or five containers perched on my fly tying desk containing used flies. When I am on the stream and a fly gets damaged to the point that it is no longer effective, I set it aside, and at the end of the day move it to an out of service container.These flies typically have lost body parts such as legs or wings, or the hackle or thread is unraveling.

As I sorted the out of service flies, I discovered six parachute hoppers, seven chernobyl ants, and fourteen Letort hoppers. I staged them in my work area and began the process of refurbishing flies. I love this process as in most cases I salvage the first several steps of producing the fly and create essentially new flies in half the time. In addition I am recycling the most expensive part of the fly, the hook and in the case of nymphs also a bead.

I’m now moving on to smaller dry flies.


Dan’s Travels in Asia

Yesterday Dan departed for a month of traveling in Asia. He’ll return in March to be in a friend’s wedding and then return to Asia to live for five to six months.

Dan Weller’s Captain’s Log

Dan has created a blog to record and save his experiences and the link above will take the reader there. I’ll be checking it often, and this gives me a convenient link.

Amy’s Adventures

With my son Dan off to Asia on a traveling tour, I am reminded of Amy and Dan’s trip to China, so I searched out Amy’s blog to read again. I’m placing the link to Amy’s blog here so I can quickly access from my own personal site. It’s a great read for any visitors to my site interested in reading about some traveling in China.

Amy’s Adventures

Parachute Hopper 2013

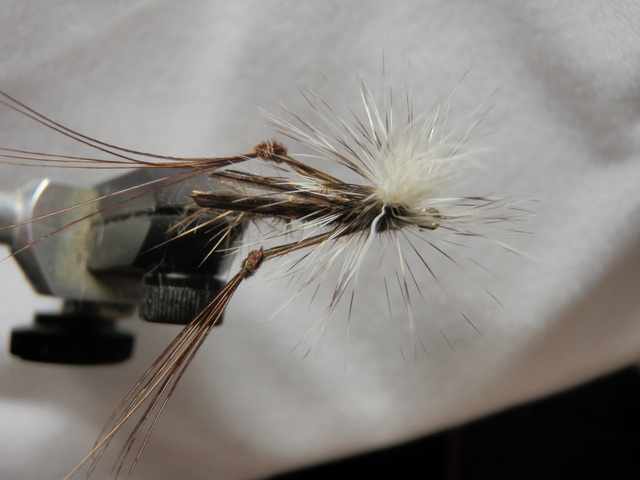
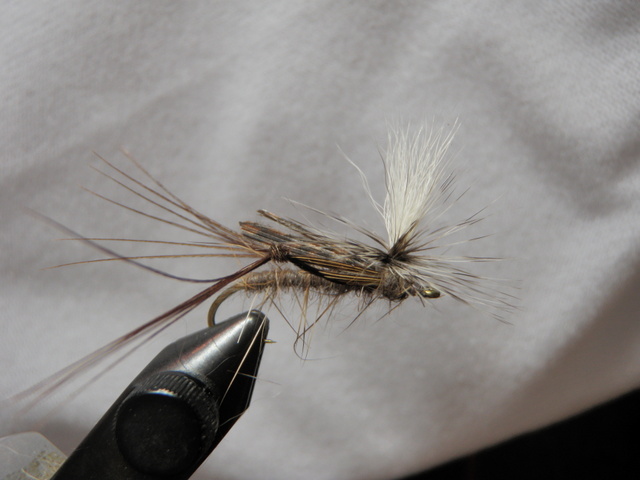
My late summer hopper of choice in the last couple seasons has been the parachute hopper. The parachute style enables this fly to land right side up on every cast and the prominent knotted pheasant tail legs along with the oversized hackle seem to appeal to trout looking for a substantial meal. For some reason the gray body parachute hopper seems to appeal more to August and September feeding trout than the yellow hopper imitations that shine in June and July.

Parachute Hopper 2013 Photo Album

Imitates Struggling Hopper from Above

Imitates Struggling Hopper from Above

The parachute hopper has also become a favorite of my son. On several occasions Dan has fished lakes and streams when his father was not accompanying. When he tells me about the outing later I always ask what fly he used as I am curious to see what he selects when I am not present to influence his decision. Quite often his answer is a parachute hopper, and typically the fly generates positive results.

Trout Love the Scraggly Hares Ear Body

Trout Love the Scraggly Hares Ear Body

During the summer of 2012 I made another interesting discovery, primarily on the Taylor River where the parachute hopper was extremely productive. Near the end of the 2011 season I tied some gray parachute hoppers using a gray poly dubbing with a visible rib and these looked quite realistic compared to the undersides of naturals that I plucked from the grasses along the river. In addition to these sleek gray poly hoppers, I also tied some using natural hares mask, and these were extremely scraggly with numerous guard hairs protruding in odd angles from the rough body of the fly. My amazing discovery on the Taylor as well as other Colorado Rivers was that the trout preferred the scraggly disheveled hares ear hopper.

With this discovery I am tying twenty hares ear parachute hoppers for the 2013 season. Hopefully the fish don’t change their preferences over the winter.

After tying 20 new parachute hoppers, I decided to go through my cache of discarded flies that are unraveling or too damaged for continued service. I discovered six parachute hoppers in need of repair and refurbished them and, therefore, I have 26 as I enter the 2013 fishing season.

Chernobyl Ant 2013

The Chernobyl ant is another of my favorite large attractor flies that I use as a top fly indicator when using the dry/dropper approach. The large foam ant is very buoyant and the bright indicator foam makes it visible in most situations. There are also times when the fish go for this clump of foam as if it represents the last meal. Unfortunately there are other times when the Chernobyl ant draws refusals and in this case it serves as a distraction from the trailing nymph.

Chernobyl Ant Photo Album

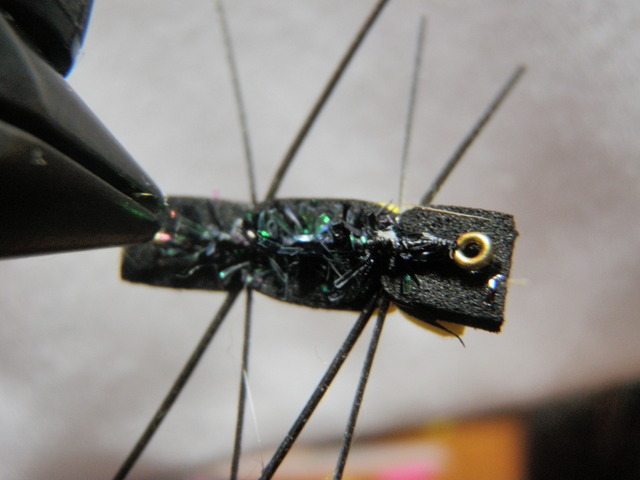
I needed to replenish my stock of this frequently used fly so I decided to take some lessons from the pool toy construction. First I went to YouTube and viewed several video demonstrations of tying the Chernobyl ant. They all seemed to use two layers of foam, but I prefer one layer with pearl chenille wrapped around the hook beneath the first layer. The irridescent pearl chenille imitates the underside of many natural beetles that I’ve observed, and I feel this is a triggering characteristic. I could probably wrap the pearl chenille beneath two layers of foam, but I view two layers as making this fly unnecessarily difficult to tie.

Lots of Radiation Here

Lots of Radiation Here

Two aspects of the fly that I attempted to improve upon in my latest tying efforts are the legs and the tendency of the foam to spin around the hook after several catches. I learned from the pool toy the importance of having a base on the hook shank to attach the foam to, so I made sure to wrap the pearl chenille over the hook shank at the points where I tied the foam to the hook. In addition I used a stronger and heavier thread that allowed me to apply significantly more pressure on my downward locking wraps on the foam. And the last step I took was to apply Sally Hanson teflon clear nail polish to the front and rear wraps. The teflon product is quite thin and soaks into the thread wraps. On the flies I’ve completed I’ve tested the contact of the body to the hook, and they seem to be much more solid than my previous efforts.

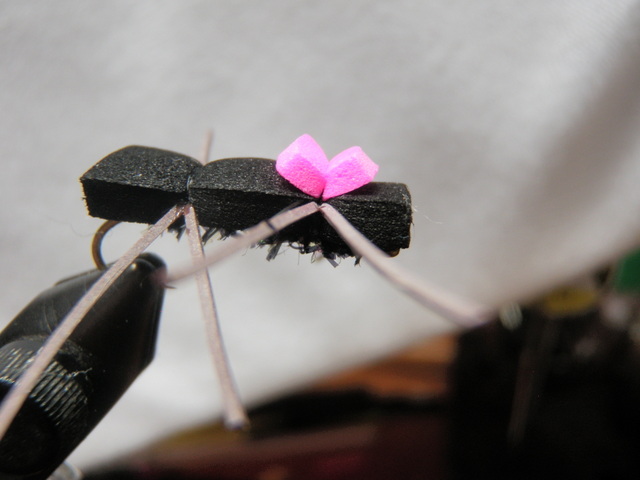
For the legs I experimented with finer more flexible materials and left the legs longer. My theory is that the longer flexibile legs will create more movement and thus attract more fish. I can always cut back the legs on the stream if I feel they are a deterrent to fish. My favorite leg material so far is a product called Sili Legs, and I’ve made several versions with barred legs and more with black legs. Another pool toy lesson that I’ve applied to my new Chernobyl ants is the usage of bright pink foam as an indicator in addition to the bright yellow I used on the past.

Pink Indicator on This One

Pink Indicator on This One

I plan to create at least 20 new and improved Chernobyl ants as we head into the 2013 season. Stay tuned to this blog to find out how this experiment plays out.


Yellow Letort Hopper

It’s simple to tie and is probably my best large top fly producer, so why do I keep trying to find a replacement? Every year I experiment with a new foam hopper concoction, but I continue returning to the simple classic Letort hopper. This year I’m trying the Grillos pool toy. Last year it was the Charlie Boy hopper.

The problem with the Letort hopper is buoyancy. The large deer hair wing is very visible and it supports beadhead nymphs up to size 14 rather well; however, after fishing a couple pockets or runs it requires drying. This usually involves sopping up excess moisture using my shirt and then dipping in the white dry shake powder. It works, and I’ve been known to spend whole days following this routine, but I continue to seek an imitation that fools trout as well as the Letort hopper, but offers superior buoyancy.

In spite of my efforts to phase the Letort hopper out, I rely on it heavily so I tied twenty size 10 models with nice full wings. I viewed a YouTube video and adopted the clipped deer hair head refinement that the tier demonstrated. The ones I made recently look great, and I applied head cement to the wraps before tying down the deer hair, so these should be extremely durable.

Classic Letort Hopper

Classic Letort Hopper

I’m convinced that the narrow body profile and yellow body color of this fly enable it to serve double duty as a hopper imitation as well as a golden stonefly adult. I’ve had great success with this fly in late June and early July when golden stoneflies are prevalent on western streams. The Letort hopper remains in a prominent position in my fly box.