Category Archives: Nymphs

Ultra Zug – 01/31/2012

 
Another fly that caught my eye as I perused the Scott Sanchez book was the ultra zug so I decided to make some. I made five with beadheads, and I think these could be used in place of prince nymphs. I love the crystal flash rib and the collar of spun dubbing. They look extremely buggy and require no wing case or feather fibers for legs.
 
ComponentMaterial
HookTiemco 2457, size 14
BeadGold to fit hook
ThreadBlack 6/0
TailGuinea feather fibers
RibStrand of crystal flash
BodySynthetic peacock dubbing
CollarSynthetic peacock dubbing spun and clipped
 
Zug Bug

I’m betting the fish will not miss the wing case and legs. I’ve had the most luck with prince nymphs during the Arkansas River caddis season of late April and early May. I believe the trout take the prince nymph for submerged egg layers, and the ultra zug could work well in this situation.

Closer View


Craven Soft Hackle Emerger – 01/19/2012

I finished tying all the flies on the list I generated in November, so now the fun part has arrived. I decided to make some new flies I’d never tied before, and last night I browsed through my Charlie’s Fly Box book by Charlie Craven and selected two new patterns to tie; Craven’s soft hackle emerger and a mugly caddis.

ComponentMaterial
HookTiemco 100 Size 18
ThreadGray 6/0
TailWhite fluoro fiber
AbdomenMuskrat
WingWhite fluoro fiber
HackleBlue dun hen hackle
ThoraxMuskrat


The soft hackle emerger appeals to me as a potential alternative to the RS2 that I frequently fish when blue wing olives are in the air. The white tail and wing made from fluoro fiber looks like a true fish attractor.  On Tuesday I made the lunch time drive to Old Arvada and purchased 5 minute epoxy to appropriately finish the jujubaetis flies, bought white fluoro fiber for the soft hackle emerger, and finished my shopping with two tan colored snowshoe rabbit feet for the mugly caddis.

Craven Soft Hackle Emerger

On Wednesday and Thursday I sat down at my vice and produced ten soft hackle emergers. The first five were tied per the directions in the book, and I was quite pleased with the results even though I struggled to fold the hackles. I added five on Thursday night tied on a size 18 scud hook with a small silver bead. I’m anxious to try both types as replacements for the RS2.

Beadhead Soft Hackle Emerger

Beadhead Pheasant Tail Nymph – 01/11/2012

When I first moved to Colorado this fly was my dominant producer. I fished frequently in the South Platte River below Deckers, CO because of the proximity to my home and the great fishery that existed there prior to the Heyman Fire. Drifting a nymphing rig with a strike indicator, a split shot or two, a pink San Juan worm and a beadhead pheasant tail was money in the bank just about any time of year. However during the pale morning dun hatch time period of mid-June to mid-July, the pheasant tail nymph was unsurpassed.

ComponentMaterial
HookTiemco 2457, Size 16
BeadGold to fit hook size
RibFine copper wire
TailPheasant tail fibers
AbdomenPheasant tail fibers
Wing FlashStrand of pearl flashabou
Wing CaseFlash back black
ThoraxPeacock Herl


Beadhead Pheasant Tail Nymph

I can remember days fishing with my friend Dave Gaboury where every upstream cast produced a hit on the beadhead pheasant tail before, during and after a PMD hatch. In one instance, a strong hatch commenced and when fish began to rise to the surface, I switched to a PMD dry fly while Dave G. continued with his nymph system. Dave G. totally outfished me with the nymphs compared to my dry fly.

Flashback Wing Case

Over time I’ve modifed the standard pheasant tail by adding a gold bead, tying on a curved scud hook, adding a strand of pearl flashabou to the wing case, and using peacock herl for the thorax instead of pheasant tail fibers. I needed 16 beadhead pheasant tails to replenish my inventory for 2012, and I can report that I am ready to go.

Beadhead Bright Green Caddis Pupa – 01/10/2012

While living in Pennsylvania after I’d begun fly fishing, my Dad and I rented a cabin along the Beaverkill River in the Catskills of New York. I had just purchased Gary LaFontaine’s book Caddisflies and took it along on the trip. During one of our daily trips we accessed the upper Beaverkill above the junction pool and discovered the stocking truck.

ComponentMaterial
HookTiemco 2457, Size 16
BeadGold to fit hook size
Pupa sheathDark olive sparkle yarn
Abdomen2 parts bright green yarn and 1 part dark olive sparkle yarn
WingBrown deer hair
Head/ThoraxRed brown dubbing

Bright Green Caddis Pupa Top View

After the truck departed we could see dense numbers of fish in the stream and after an hour or so of fishing, I began to see caddis emerging from the river. I tied on one of the bright green caddis pupa that I’d tied based on LaFontaine’s book and began to catch fish in rapid fire succession. This is quite a while ago, but I recall having at least two doubles where I had two fish at once.

From the Side

After this experience I began to attach a bright green caddis pupa to my line every time I noticed fish feeding on caddis. It took me awhile to realize that not all caddis have bright green bodies, but more times that not the strategy worked. I continued using the bright green caddis in Colorado and added a gold bead to enable fishing as a dropper from a large attractor. The bright green caddis pupa has been and continues to be one of my top producers in Colorado. In order to begin 2012 with 25 in inventory, I tied 13 new ones and stocked them in my fly box.

Beadhead Emerald Caddis Pupa – 01/01/2012

Many years ago I traveled to Pennsylvania and visited my family and while there made a trip to the Tulphehocken Creek in Berks County to fish for trout. I encountered a nice caddis hatch near Blue Marsh Dam, but I was unable to consistently hook and land fish despite fairly heavy surface feeding. On a subsequent trip I visited Tulpehocken Creek Outfitters in Reading, Pa., and a gentleman in the store sold me some small emerald and light yellow caddis pupa and adults. I experienced increased success on the Tulpehocken with these flies and subsequently tied some of my own.

Emerald Beadhead Caddis Pupa


Around eight years ago I returned to Pa. for a college reunion and arrived early to do some fishing in Penns Creek with my friend Jeff Shafer. On an overcast Saturday morning Jeff introduced me to some new water near Coburn. We were having only a small amount of luck when I noticed some caddis dancing on the water. I managed to catch one and inspected its body and discovered a dark gray color with a hint of emerald at the tip of the abdomen. I decided to tie an emerald green caddis pupa to my line and managed to catch several nice fish after this change.

ComponentMaterial
HookTiemco 2457, Size 16
BeadGold to fit hook size
Pupa SheathGray sparkle yarn
AbdomenEmerald sparkle yarn
WingGray deer hair
Head/ThoraxGray dubbing like muskrat

Tilted View


Based on this success in Pennsylvania, I began to experiment with the emerald caddis on Colorado Rivers, and I’ve discovered that the fish in the west like them just as much as the eastern fish. I planned to have 25 emerald caddis entering the 2012 season so I tied 13 fresh versions to rebuild my inventory.

Salvation Nymph – 12/30/2011

On the same trip to the Conejos River when I purchased western green drakes I also purchased some dark beadhead nymphs with iridescent backs and small rubber legs. I never asked what they were called so I’ve named them shimmering pheasant tails. These nymphs were quite effective on the upper Conejos River on my first day of fishing there.

Purchased Iridescent Nymph

I used the nymphs in a dropper configuration behind a Chernobyl ant and caught a lot of fish along the edge.

I lost quite a few of the purchased flies, so I made sure to maintain at least one in my foam pocket to use as a model when I attempted to replicate. In fact I took the sample version with me on a trip to Charlie’s Fly Box in Old Arvada and asked the store salesperson to help me purchase the materials required to tie a shimmering pheasant tail. He did just that, and I returned home with two colors of ice dub, silly legs and a sheet of flash back black.

ComponentMaterial
HookTiemco 2457 Size 14 or 16
BeadGold to fit hook size
ThreadBlack
TailFibers from pheasant body feather
RibFine copper wire
FlashPearl flashabou
Nymph BackFlash back black
AbdomenSilver holographic ice dub
ThoraxBlack peacock ice dub
LegsSilly legs
Wing CaseFlash back black and pearl flashabou


I gathered all the materials together and placed the purchased shimmering nymph on the magnet beneath my vise and began my first fly. First I threaded the bead over the hook point and slid it to the eye of the hook. Next I attached thread and wrapped it to just beyond the hook bend. I tied in a short stubby tail using pheasant body feather fibers. This was the only natural material in the entire fly. Next came a section of fine copper wire and then a strand of pearl flashabou followed by a thin strip of the flash back black. I opened the package of silver holographic ice dub next and observed that it appeared to be a massive clump of tinsel. How does one apply this metallic stuff? I took a small amount and twirled it on to the thread and miraculously it adhered just like natural dubbing.

Dave’s Shimmering Pheasant Tail

I pulled the flash back black up over the dubbed abdomen and then the pearl flashabou as well and then spiral wrapped the copper wire to the front of the abdomen. Next I folded the flashabou and flash back toward the rear over the abdomen and locked it there with a few turns of thread. Now for the thorax I grabbed the packet of black peacock ice dub and spun it on to my thread. I wrapped the black peacock from the front of the abdomen to behind the bead and then cut two small sections of black silly legs and mounted them on both sides of the thorax. Finally I pulled the flash back and flashabou forward over the top of the thorax dubbing and tied down and whip finished. I trimmed the legs to be even on both sides and as a last step coated the head threads and the entire top of the fly with Sally Hanson Hard As Nails.

Top View, My Favorite

I removed the fly and placed it next to the purchased model and concluded that I’d produced a fairly close replica. This is another new creation I am anxious to test in 2012.

Sunken Trico – 12/5/2011

During September 2011 I made my first ever fishing trip to the North Platte River at Northgate Canyon. On my way I stopped at the North Park Fly Shop to obtain information about access and fishing conditions. The young man in the fly shop told me that tricos were hitting the water between 11AM and 1PM and BWO’s were emerging in the afternoon. Since I didn’t have more than one or two trico spinners I attempted to purchase some at the shop. Unfortunately North Park was out of them, but the young man I spoke with recommended buying sunken tricos.

I purchased four or five sunken tricos and sure enough I noticed swarms of tricos above the riffles in the late morning. At around noon the tiny tricos hit the water and trout began to rise and sip them in. Since I didn’t have trico  spinners, I added a sunken trico as a dropper to my large attractor top fly, and I was amazed to discover that the fish loved subsurface tricos as much as the ones floating on the surface. The sunken tricos I purchased had black bodies with wings made out of a material that almost looked like the clear plastic used to make baggies.

I promised myself that I would make sunken tricos, but never got around to it last winter. Once again in September of 2011 I made a trip to the North Platte River and stopped at the North Park Angler. The same salesperson was present and once again recommended sunken tricos. I asked about the ones with the plastic style wings, and he no longer had those so I purchased some with black bodies and white poly wings. The wings were swept back over the body caddis style. I didn’t have any success on the North Platte with these flies, but on a later trip to the Arkansas River I managed to hook and land one or two fish on this version of a sunken trico.

As I prepare for the 2012 season, I finally got around to tying sunken tricos. I searched online and found a pattern where the abdomen was constructed with fine black wire. I wasn’t convinced that a body made from fine wire would be narrow enough, so when I visited Charlie’s Fly Box to purchase materials I asked the clerk how he would make a sunken trico. He suggested tying them with a tiny black tungsten bead behind the eye of the hook so I bought some very small black tungsten beads.

ComponentMaterial
HookTiemco 101 Size 24
ThreadBlack 6/0
TailDun hackle fibers
AbdomenBlack tying thread
WingWhite poly yarn
ThoraxBlack tying thread or small amount of black dubbing


Size 24 Sunken Trico

Early during this past week I sat down and tied six sunken tricos. I threaded the tiny beads on to the Tiemco 101 size 24 hooks and then tied tricos in the same manner that I have tied them since I began fly fishing and fly tying. I stripped some stiff barbules from a large hackle feather and tied them in for tails. I wrapped black thread forward to create the abdomen and then I took a sparse clump of white poly yarn and tied it in behind the bead and used figure eight wraps to secure the spent wing.

Black Tungsten Bead for Sinking

I like the look of this fly, and I’m anxiously anticipating encountering a trico hatch this summer to see how they perform.

Wiggle Damsel – 12/4/2011

Quite a few years ago I tied five to ten damsel nymphs made with light olive marabou on a size 12 long shank hook. I didn’t fish these frequently, but I liked having them available in my fleece wallet particularly for occasions when I visited a lake.

In June while waiting for the snowmelt to subside in Colorado I made a trip to the Rocky Mountain Arsenal warm water lakes. The first fly I tied to my leader was a damsel fly nymph as it was June and I observed a lot of aquatic vegetation. These were perfect conditions for damsel nymph migrations and hatching. I managed to land a small bass and decent crappie bass before losing my fly. At this point I discovered that only one damsel nymph remained in my fly wallet so I resolved to tie more during the coming winter.

Well that time was upon me, so I prepared to tie damsel nymphs. First I searched through my fly tying books and found a pattern in Charlie Craven’s book called the wiggle nymph, and another pattern called the twisted damsel in a book by Larry Tullis. Neither of these matched the ones I made previously, so I searched the internet and found one similar in style to the ones I tied before.

Next I made a list of the materials I required and discovered that I had dark olive marabou but none of the light olive that was listed in the fly recipes. The wiggle damsel was actually an articulated fly that required two hooks. I never made an articulated fly, but used several that were quite effective in Alaska, so I decided to experiment with a new damsel nymph.

I made a short trip to Bass Pro Shop on Friday night and purchased some small black beadhead eyes and 3X tippet to connect the two hooks, but Bass Pro did not have the desired light olive marabou. On Saturday afternoon after tying beadhead prince nymphs, Jane and I trekked to Old Arvada to Charlie’s Fly Box, and I purchased the highly sought after light olive marabou.

ComponentMaterial
HooksTiemco 101 size 14 or 16 and Tiemco 3761 size 14 for front hook
ThreadPale olive 6/0
Body/Head/WingPale olive marabou
EyesBlack bead chain (extra small)
Connection3X fluorocarbon tippet


On Sunday afternoon after watching the Broncos pull out another win over the Vikings, I sat down to manufacture wiggle damsels. I used a Mustad 9671 size 12 for the front fly and a standard size 14 dry fly hook for the rear. I tied 10 tails by tying down a clump of marabou fibers for the tail and then winding the clump forward to the eye. After whip finishing the size 14 hook I used wire cutters to cut off the bend and hook point and set these aside in a plastic cannister for subsequent use.

Next I clamped the larger hook in the vise and tied in the black mono eyes with figure eight wraps and then moved to the rear of the front hook. I clipped a one inch section of 3X mono from the spool, threaded it through the eye of the previously prepared tail section and then bound the monofilament to the front hook so that the tail now dangled from the rear. Finally I tied in a clump of marabou to the rear of the front hook just like I had done for the tail and then wound it forward, under the eyes and then back over the top of the eyes and finished off.
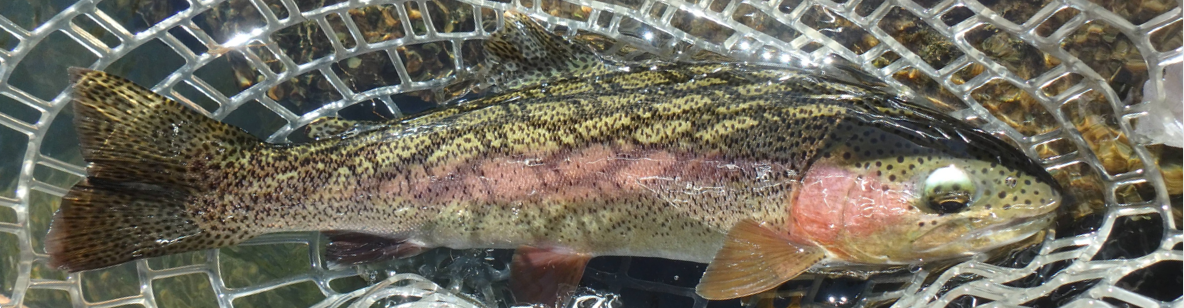
Wiggle Damsel

I can’t wait to fish these flies as they look like great fish attractors. The wiggle tail and undulating marabou fibers should make this fly appear to be alive all the time.

Weekend Production

Beadhead Prince Nymph – 12/3/2011

The prince nymph is another favorite fly of western fly fishers. This classic has great fish attracting features including a bead, iridescent peacock herl, and contrasting white wings. I always want to enter a new season with an adequate supply of beadhead prince nymphs.

In addition, I’ve discovered that a prince nymph is highly effective during the caddis hatches on Colorado Rivers. I’m guessing they are a reasonable imitation of egg laying caddis that dive into the river and swim to the stream bottom to lay their eggs. I’ve had some great success with prince nymphs late in the afternoon after the adult caddis have already hatched.

A Prince Nymph

ComponentMaterial
HookSize 14 nymph or wet fly hook
BeadGold
ThreadBlack 6/0
TailBlack or brown goose biots
RibFine gold wire
Abdomen/ThoraxPeacock herl
LegsBrown hen hackle
WingsWhite goose biots


I was prepared to begin tying damsel nymphs, but discovered I didn’t have light olive marabou, so I moved on to tying beadhead prince nymphs over the weekend. The first five were weighted with wire, and the next five were unweighted. Hopefully I now have an adequate stock of this reliable producer.

Beadhead RS2 – 11/20/2011

Perhaps the second most productive fly in my arsenal after the beadhead hares ear is the beadhead RS2. Whenever I see any BWO adults in the air, I quickly tie a beadhead RS2 to my line. Sometimes the RS2 is a second dropper from a large buoyant attractor, and this can be a deadly approach. Other times I add a strike indicator and split shot and then a larger nymph followed by the beadhead RS2. When the fish are very active chasing emergers, the deep method seems to outperform the dead drift dropper approach.

ComponentMaterial
HookSize 22 straight eye
BeadSmall silver bead
ThreadGray 6/0
TailSeveral fibers from pheasant body feather
BodyMuskrat fur
WingGray fluff from base of pheasant body feather


RS2

This is another fly that I stocked too few of entering the 2011 season, and I was forced to tie an extra supply late in the season. Consequently I have only five in inventory and needed to tie an additional 25 to build my stock to 30. Happily this was accomplished over the weekend, and I hope to be adequately prepared for BWO hatches in 2012.

25 RS2's to Open Season